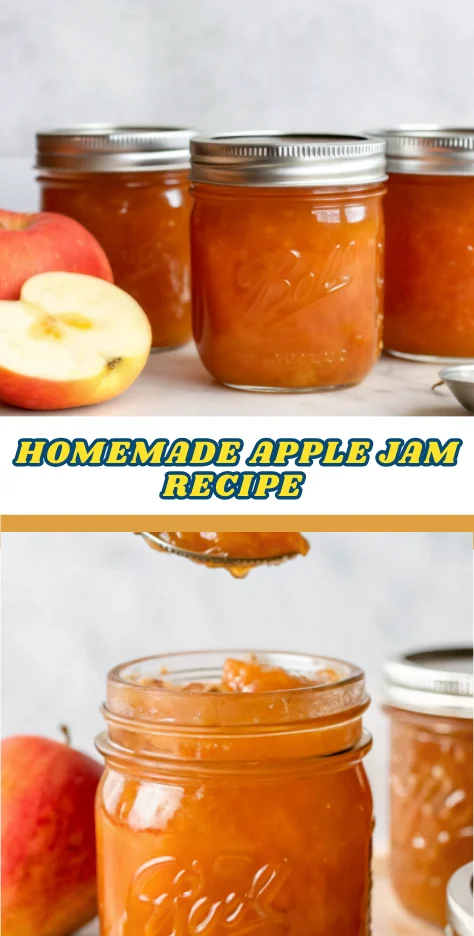
Did you know that the global market for canned fruit preserves, including apple jam, is expected to grow at a compound annual growth rate (CAGR) of around 5% over the next few years? This surge in popularity isn’t just about nostalgia—apple jam represents a return to artisanal, homemade preserves that offer both incredible flavor and impressive nutritional benefits. Whether you’re new to home canning or looking to expand your preserve repertoire, this comprehensive apple jam recipe will guide you through creating a delicious, chunky preserve that captures autumn’s essence in every jar.
Apples are also a rich source of polyphenols, an important group of antioxidants. While nutrition labels don’t list these plant compounds, they’re likely responsible for many of the health benefits of apples. By transforming fresh apples into jam, you’re not only preserving their natural goodness but creating a versatile condiment that’s perfect for everything from breakfast toast to gourmet cheese pairings.
Ingredients List
For Apple Jam (Makes approximately 16 cups or 4-5 half-pint jars):
• 6 lbs fresh apples – Choose firm varieties like Honeycrisp, Granny Smith, or Gala for the best texture. When it comes to choosing the right apples for the job, I typically choose firm-fleshed varieties suitable for pie-making that are both tart and sweet. Think Empire, Granny Smith, or Honeycrisp apples (or a mixture of any kind of pie apple). This yields about 4 lbs prepared fruit after peeling and coring.
• 4 cups granulated sugar – Essential for both sweetening and preservation. The sugar also helps maintain apple chunks through maceration.
• 1/2 cup fresh lemon juice – Provides necessary acidity for safe canning and enhances the natural apple flavor while preventing browning.
Ingredient Substitutions:
- Apple varieties: Mix different types for complex flavor profiles
- Sugar alternatives: For lower sugar versions, consider using no-sugar-needed pectin, though texture may vary
- Lemon juice: Fresh is preferred, but bottled works in a pinch
Timing
Preparation Time: 30 minutes (plus 4-24 hours maceration)
Active Cooking Time: 20-30 minutes
Canning Process: 15 minutes
Total Time: Approximately 90 minutes (excluding maceration)
Canned apple jam fits perfectly into this trend as it requires no preparation and can be consumed straight from the can or used in recipes with minimal effort. This ease of use has attracted busy families, young professionals, and health-conscious consumers alike, driving sales. The maceration process, while requiring advance planning, is what sets this recipe apart from typical 30-minute preserves.
Step-by-Step Instructions
Step 1: Prepare the Apples
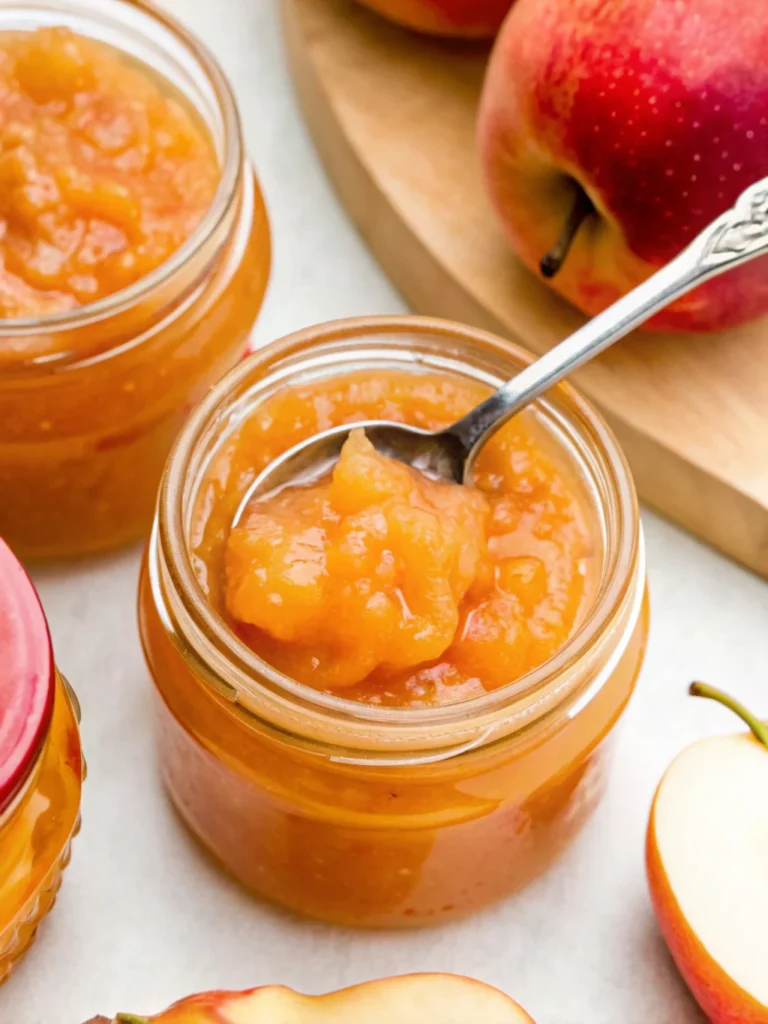
Wash, peel, core, and dice 6 lbs of apples into 1/4 to 1/2-inch pieces. To begin this recipe, you’ll need to peel, core, and cut the apples into a 1/4 to 1/2-inch dice; they aren’t going to cook down extensively, so don’t go much smaller in terms of the size of the dice. This size ensures your finished jam will have distinct apple pieces rather than turning into applesauce.
Step 2: Begin Maceration
To achieve this effect, the diced apple is soaked in a mixture of lemon juice and granulated sugar overnight. This simple maceration technique draws liquid from the apple pieces which yields firmer fruit, which in turn means the apples won’t break apart and melt into the jam during the cooking process. Combine diced apples with 4 cups sugar and 1/2 cup lemon juice in a large bowl. Cover and refrigerate for at least 4 hours, preferably overnight.
Step 3: Prepare for Cooking
Remove the macerated fruit mixture from refrigerator. Set up a large fine mesh sieve over your jam pot or heavy-bottomed saucepan to drain the fruit, reserving the liquid separately.
Step 4: Cook the Liquid Base
Bring the reserved liquid from the macerated fruit to a rolling boil. This concentrated syrup will form the base of your jam and help achieve proper consistency.
Step 5: Add Apples and Cook
Add the drained apple pieces to the boiling liquid. Reduce heat to medium-high and cook for 20-30 minutes, stirring occasionally to prevent scorching. Gel stage is 220 degrees F at sea level and a bit below that at higher elevations. The finished temperature drops by 1 degree for every 500 feet above sea level.
Step 6: Test for Doneness
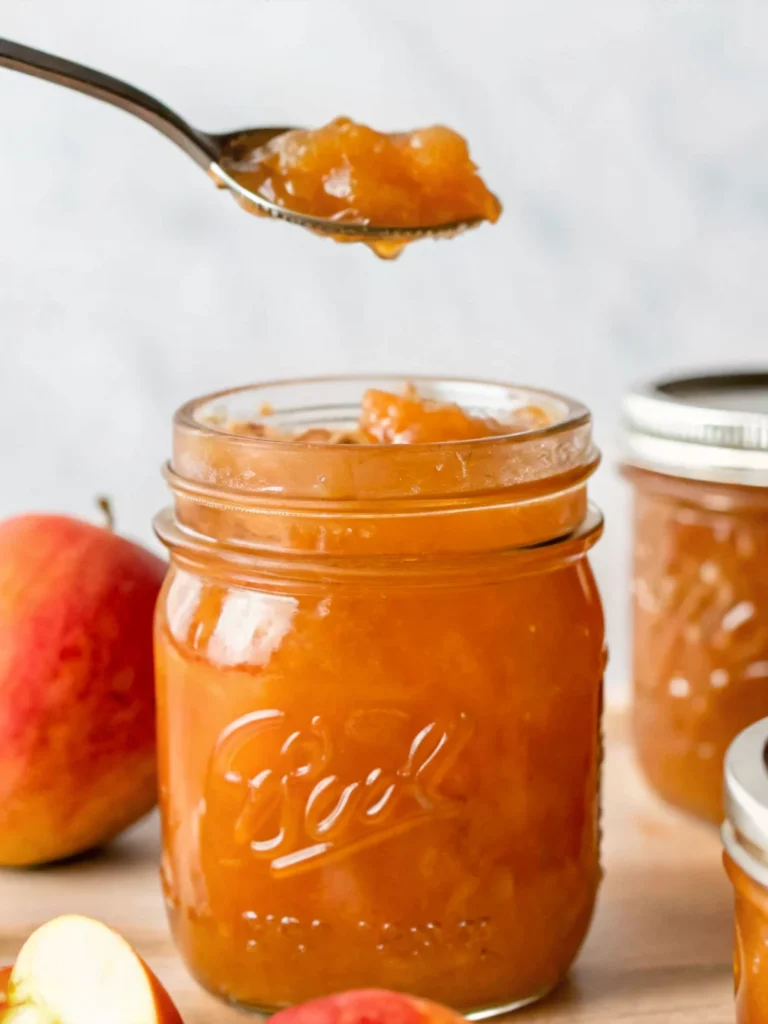
Your jam is ready when it reaches the gel stage or passes the plate test—a small amount placed on a frozen plate should wrinkle when pushed with your finger.
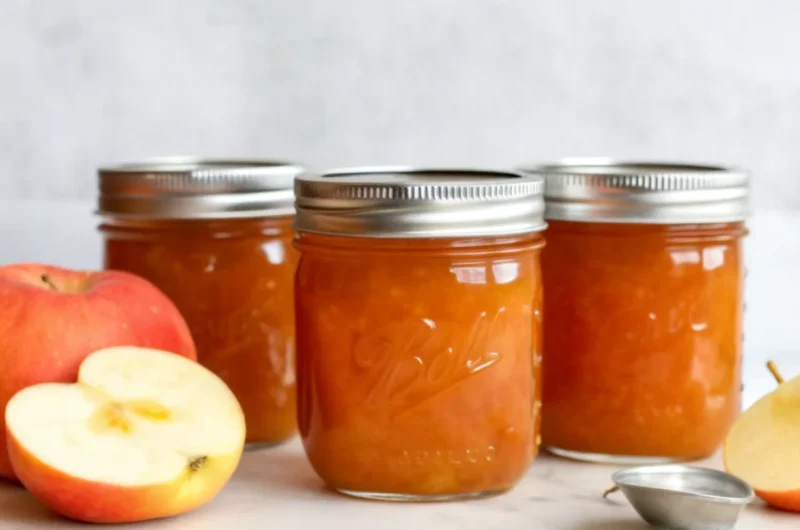
Step 7: Fill and Process Jars
Fill hot, sterilized jars with the hot jam, leaving 1/4-inch headspace. Remove air bubbles, wipe jar rims clean, and apply two-piece canning lids. Process in a boiling water bath for 10 minutes.
Step 8: Cool and Store
Allow jars to cool undisturbed for 12-24 hours. Test seals and store properly sealed jars in a cool, dark place for up to 18 months.
Nutritional Information
Per 1-tablespoon serving (approximately 20g):
- Calories: 47
- Carbohydrates: 12.3g
- Protein: 0.1g
- Fat: 0.1g
- Fiber: 0.8g
- Sugar: 11.3g
- Vitamin C: 1.8mg
- Potassium: 32mg
Apple jam generally provides a good source of: Fiber: Apples are rich in dietary fiber, which aids digestion, promotes gut health, and helps you feel full for longer. Vitamins and Minerals: Apples contain essential vitamins and minerals, including vitamin C, potassium, and antioxidants. These nutrients play crucial roles in various bodily functions.
Key Nutritional Benefits:
- Antioxidants: To get the most out of apples, leave the skin on. The skin contains half of the fruit’s fiber and most of its polyphenols.
- Digestive Health: Natural fiber supports healthy digestion
- Heart Health: Its fiber content, vitamins, minerals, and antioxidants contribute to various health benefits, including improved digestion, weight management, heart health, and boosted immunity.
Healthier Alternatives for the Recipe
Reduced Sugar Version:
- Replace 2 cups sugar with stevia or monk fruit sweetener (added after cooking)
- Use no-sugar-needed pectin for better gel formation
- It’s important to consume apple jam in moderation due to its high sugar content. 1-2 tablespoons per day would be enough to enjoy the flavor without consuming excessive sugar.
Enhanced Nutrition Options:
- Add 1 tsp ground cinnamon for antioxidant benefits
- Include 1/4 tsp ground ginger for digestive support
- Mix in 1 tbsp chia seeds during the last 5 minutes of cooking for omega-3s
Diabetic-Friendly Modification:
- You could use Splenda® as the optional sweetener in a jam or jelly made with a no-sugar needed pectin, such as Mrs. Wages™ Lite Home Jell® Fruit Pectin, Ball® No-Sugar Needed Pectin or Sure-Jell® for Less or No-Sugar-Needed Recipes. With these low-methoxyl pectins, no sugar is required at all. Sugar substitutes can be added as desired simply for flavor.
Serving Suggestions
Breakfast Applications:
- Spread on warm sourdough toast with butter
- Swirl into Greek yogurt parfaits with granola
- Smoothies: Blend apple jam with yogurt, fruits, and a splash of liquid for a delicious and nutritious smoothie. Parfaits: Layer apple jam with Greek yogurt, granola, and fresh berries for a healthy and satisfying breakfast or snack.
Savory Pairings:
- Savory Dishes: Apple jam can also add a sweet and tangy element to savory dishes. Try using it as a glaze for grilled chicken or pork.
- Pair with artisanal cheeses on charcuterie boards
- Use as a condiment for turkey sandwiches
Gourmet Applications:
- Fill thumbprint cookies or pastry tarts
- Baked Goods: Add apple jam to your favorite baked goods, such as muffins, cakes, and cookies. It adds a burst of flavor and moisture.
- Create elegant apple jam and brie puff pastry bites
Common Mistakes to Avoid
Texture Issues:
- Overcooking: Stir often to avoid burning and be careful not to overcook as it can result in a firm, over-set jam.
- Skipping maceration: This crucial step prevents mushy apple pieces
- Wrong apple size: Pieces too small will break down completely
Safety Concerns:
- Insufficient headspace: Always maintain 1/4-inch headspace for proper sealing
- Poor jar preparation: Use only new lids and properly sterilized jars
- Inadequate processing time: Follow exact processing times for your elevation
Quality Problems:
- Using overripe apples: To experience the best taste I will advise you to make sure that the apples used in the jam are not stale and chop off that darkened or soft part. Otherwise, the jam will not be preserved for long.
- Inconsistent stirring: Can lead to scorching on the bottom
Storing Tips for the Recipe
Refrigerator Storage:
- Unsealed jars keep for 2-3 weeks in refrigerator
- Always use clean utensils when serving to prevent contamination
Pantry Storage:
- Proper water bath canned preserve should maintain peak quality for 12-18 months after canning (and be fine to eat for longer).
- Store in cool, dark location away from direct sunlight
- Check seals periodically—any unsealed jars should be refrigerated immediately
Freezer Options:
- You can make a quick refrigerator or freezer jam with this apple jam recipe, and it’ll last in the refrigerator for a few weeks, or freezer for up to 6 months.
- Use freezer-safe containers with tight-fitting lids
- Leave 1/2-inch headspace to allow for expansion
Long-term Storage Tips:
- Label jars with contents and date
- Rotate stock using oldest jars first
- Store extra lids and rings separately for future use
Conclusion
This apple jam recipe transforms simple ingredients into a gourmet preserve that captures autumn’s essence perfectly. Through proper maceration and careful cooking, you’ll achieve beautifully textured jam with distinct apple pieces suspended in a golden, flavorful base. The natural pectin in apples eliminates the need for artificial additives, while the traditional canning process ensures long-term storage capability.
Ready to create your own apple jam masterpiece? Try this recipe and share your results in the comments below! We’d love to hear about your favorite apple varieties and creative serving suggestions. Don’t forget to subscribe to our blog for more seasonal preserving recipes and canning tips that will fill your pantry with homemade goodness all year long.
FAQs
Q: Can I make this recipe without canning for immediate use?
A: Absolutely! Simply prepare the jam as directed, then store in clean jars in the refrigerator for up to 3 weeks. But I do recommend water bath canning or freezing your jam if you do to reduce the possibility of spoilage.
Q: Why is maceration important for apple jam?
A: The trick to making apple jam, without having it turn into apple sauce, is macerating the apples in sugar overnight. The sugar draws out liquid from the apples and firms up their texture, meaning the apple chunks won’t just dissolve into sauce as soon as they hit the heat.
Q: What’s the difference between apple jam and apple jelly?
A: What’s the difference between apple jam and apple jelly? Jelly is made from juice; jam is made from the whole fruit. It’s really that simple!
Q: Can I reduce the sugar in this recipe?
A: The sugar in this recipe is adjusted both for flavor and for gelling purposes. In other words, if you reduce the sugar, your jam may not set properly, and you’ll find yourself with a runnier result. For low-sugar versions, use no-sugar-needed pectin instead.
Q: How do I know when my jam has reached the proper consistency?
A: To test for jammy consistency, freeze a small plate (ceramic, glass, or metal) for about 20 minutes. Dollop the hot jam on the cold plate then return to the freezer for 1-2 minutes to see if it has achieved the “gel stage.” It should firm up enough to hold its shape and wrinkle when touched.
Easy 3-Ingredient Apple Jam Recipe (No Pectin Needed!)
- Total Time: 90 minutes (excluding maceration)
- Yield: 16 cups (4–5 half-pint jars) 1x
Description
A comprehensive guide to making homemade apple jam—chunky, flavorful, and perfect for everything from breakfast toast to gourmet cheese pairings.
Ingredients
- 6 lbs fresh apples (Honeycrisp, Granny Smith, or Gala), peeled, cored, and diced
- 4 cups granulated sugar
- 1/2 cup fresh lemon juice
Instructions
- Wash, peel, core, and dice 6 lbs of apples into 1/4 to 1/2-inch pieces.
- Combine apples with sugar and lemon juice, cover, and refrigerate for at least 4 hours or overnight to macerate.
- Drain apples through a fine mesh sieve, reserving the liquid.
- Bring reserved liquid to a rolling boil to form syrup.
- Add drained apple pieces to syrup and cook 20-30 minutes, stirring occasionally.
- Test for doneness using the gel stage (220°F) or plate test.
- Fill hot, sterilized jars with jam, leaving 1/4-inch headspace. Remove air bubbles, clean rims, and seal with lids.
- Process jars in a boiling water bath for 10 minutes.
- Cool jars undisturbed for 12-24 hours. Test seals and store sealed jars in a cool, dark place for up to 18 months.
Notes
For best flavor and texture, use firm-fleshed apples and don’t skip the maceration step. Proper storage ensures quality up to 18 months.
- Prep Time: 30 minutes (plus 4-24 hours maceration)
- Cook Time: 20-30 minutes
- Category: Preserves & Canning
- Method: Water Bath Canning
- Cuisine: American
Nutrition
- Serving Size: 1 tablespoon (20g)
- Calories: 47
- Sugar: 11.3g
- Sodium: 0mg
- Fat: 0.1g
- Saturated Fat: 0g
- Unsaturated Fat: 0g
- Trans Fat: 0g
- Carbohydrates: 12.3g
- Fiber: 0.8g
- Protein: 0.1g
- Cholesterol: 0mg