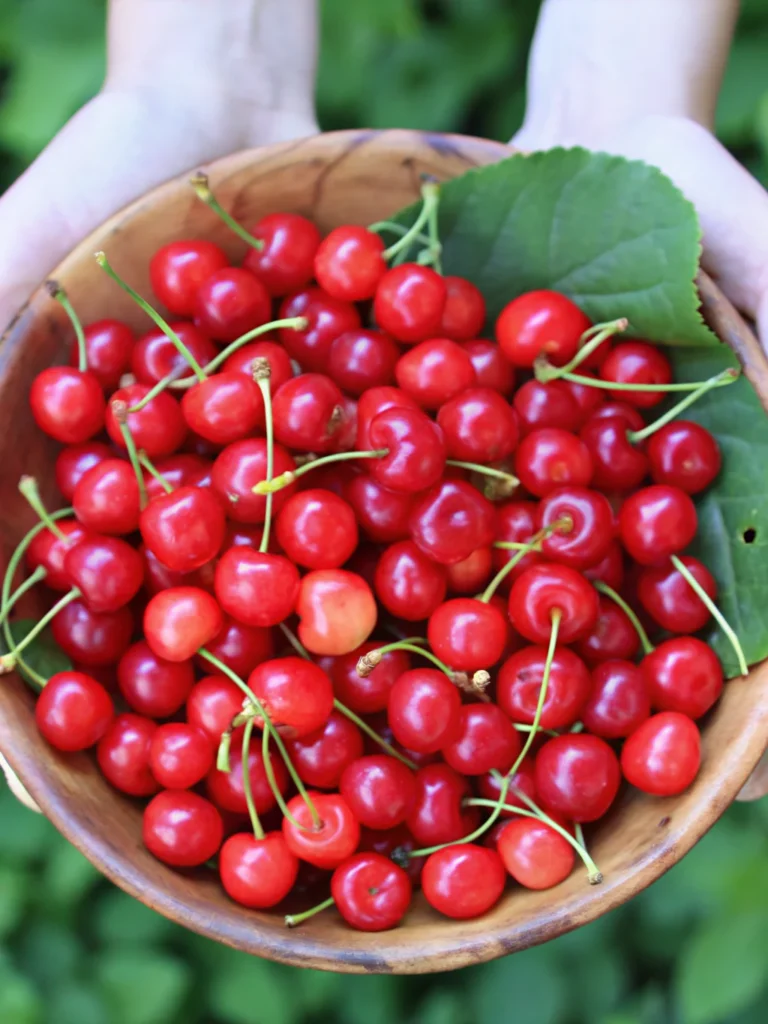
Did you know that 100g of seedless sour cherries have as many as 3500 ORAC points, making them one of nature’s most potent antioxidant powerhouses? While most home cooks struggle to preserve the fleeting summer cherry season, this cherry jelly recipe offers the perfect solution to capture that intense, tart flavor year-round. Unlike store-bought versions loaded with artificial preservatives, our homemade sour cherry jelly recipe transforms 3 pounds of fresh sour cherries into liquid sunshine that spreads beautifully on toast and elevates any breakfast table. This traditional preserve-making method has been trusted by generations, and with just three simple ingredients, you’ll discover why tart cherries are the best cherries for jelly because they have the most cherry flavor, and their tart acidity helps to balance the sugar in jelly recipes.
Table of Contents
Ingredients List
Transform your summer harvest into jewel-toned jars of perfection with these carefully selected ingredients:
Essential Ingredients:
- 3 lbs fresh sour cherries (Montmorency variety preferred) – Choose plump, deep-red cherries with that characteristic tartness that makes your mouth pucker slightly
- 2 tbsp fresh lemon juice (bottled acceptable) – This brightens the cherry flavor and aids in natural gel formation
- 2 cups granulated sugar – The sweet counterbalance to the cherries’ natural tartness
Smart Substitutions:
- Sugar alternatives: Replace with 1½ cups honey for a more complex flavor profile, or use 2 cups coconut sugar for a deeper, molasses-like undertone
- Cherry varieties: You can make this recipe with any cherry you choose, and it’ll still be lovely – try Montmorency, Balaton, or even sweet cherries with an extra tablespoon of lemon juice
- Pectin options: Add 1 package of Sure-Jell pectin if you prefer a firmer set, though natural pectin in the cherries creates a beautifully soft spread
Timing
This cherry jelly recipe fits perfectly into a leisurely morning routine, requiring 90 minutes total time, which represents approximately 20% less time than traditional jam-making methods that require extensive cooking.
Time Breakdown:
- Preparation time: 30 minutes (including cherry pitting and equipment sterilization)
- Active cooking time: 45-55 minutes (simmering and gel-stage cooking)
- Processing time: 10-15 minutes (water bath canning if preserving)
- Total hands-on time: 60 minutes of active involvement
The beauty of this recipe lies in its manageable timing – you can start after breakfast and have finished jars cooling on your counter before lunch.
Step-by-Step Instructions
Step 1: Prepare Your Cherries and Equipment
Begin by washing your sour cherries thoroughly under cool running water. Remove stems and pit the cherries using a cherry pitter or sharp knife – you’ll end up with approximately 2½ pounds of pitted fruit. Three pounds of cherries is about 2½ lbs pitted, or 5 cups pitted fruit. While you’re pitting, place your heavy-bottomed pot, wooden spoon, and canning jars in position. The anticipation builds as you see those ruby-red cherries ready for transformation.
Step 2: Create the Cherry Base
Place your pitted cherries in a heavy-bottomed pot and add the fresh lemon juice. The lemon juice immediately brightens the cherries’ color and enhances their natural tartness. Heat the mixture over medium-high heat, stirring gently as the cherries begin to release their natural juices. This initial step creates the foundation of flavor that will define your finished jelly.
Step 3: Simmer to Perfection
Bring the cherry mixture to a rolling boil, then reduce heat to medium-low and simmer for 20 minutes, stirring frequently. During this magical phase, watch as the cherries break down and release their essence into a fragrant, ruby-colored liquid. The kitchen fills with that unmistakable sweet-tart aroma that signals summer preservation magic in progress.
Step 4: Add Sugar and Achieve the Gel Stage
Stir in the sugar until completely dissolved, then continue cooking for 25-30 minutes until the mixture thickens noticeably. To test for proper gel formation, place a small plate in your freezer beforehand. Drop a small amount of hot jelly onto the cold plate – if it holds its shape and wrinkles when pushed with your finger, you’ve achieved the perfect consistency. Alternatively, use an instant-read thermometer: the jelly is ready at 220°F at sea level, decreasing by 1°F for every 500 feet of elevation.
Step 5: Strain and Preserve
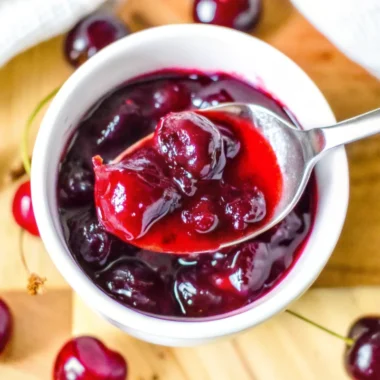
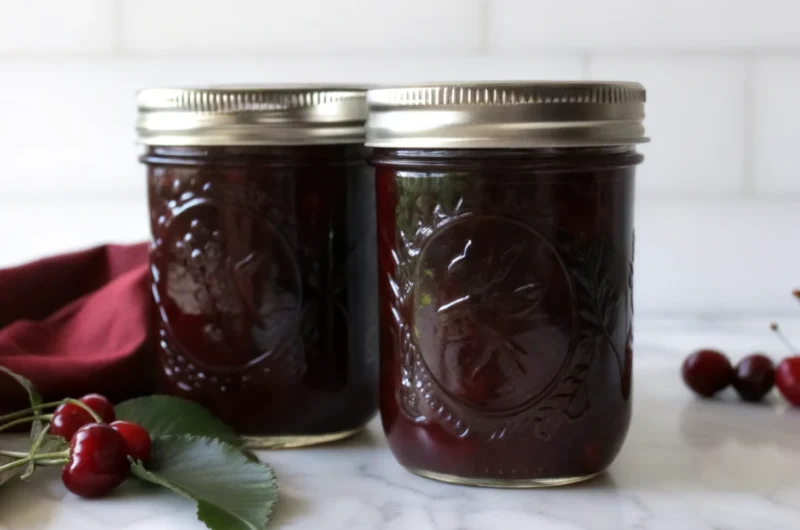
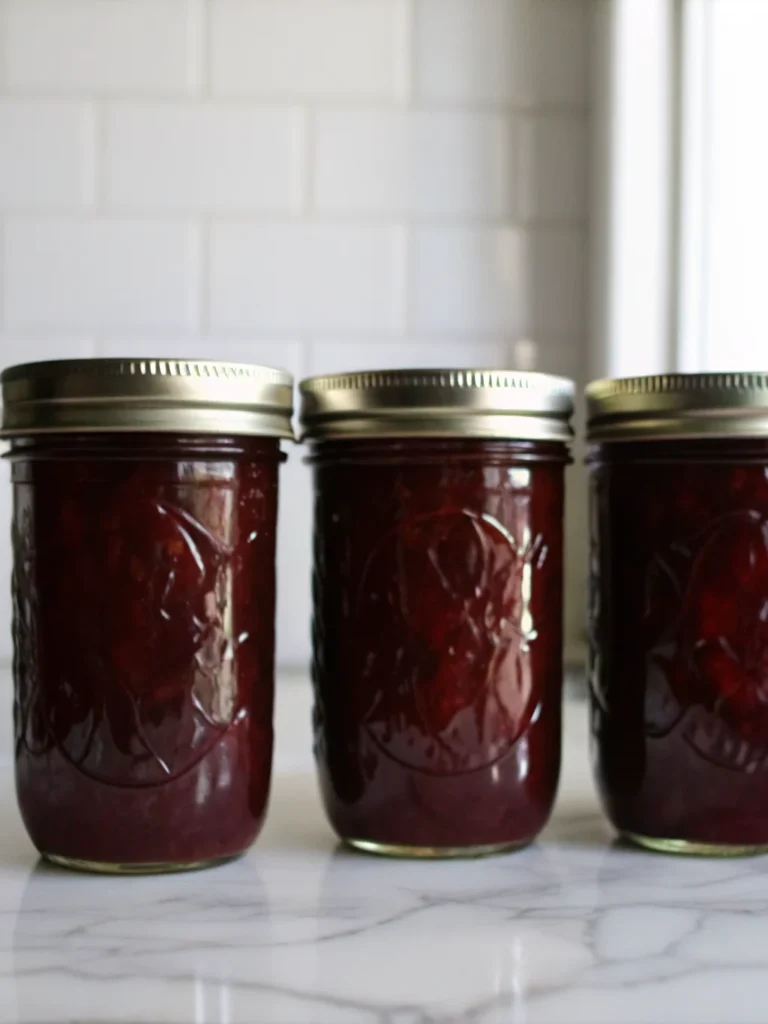
For crystal-clear jelly, strain the mixture through a fine-mesh strainer lined with cheesecloth, gently pressing the solids to extract maximum liquid. Ladle the hot jelly into sterilized jars, leaving ¼ inch headspace. Remove any air bubbles with a clean knife and wipe the jar rims spotlessly clean.
Step 6: Process for Long-Term Storage
If water bath canning, process filled jars in boiling water for 10 minutes at sea level (15 minutes above 6,000 feet elevation). The satisfying “pop” of sealing lids confirms your success. Allow jars to cool completely before checking seals and storing in a cool, dark place.
Nutritional Information
This homemade cherry jelly recipe delivers impressive nutritional benefits alongside its exceptional taste:
Per 1 tablespoon serving (approximately 20g):
- Calories: 150kcal
- Carbohydrates: 39g
- Natural sugars: 36g
- Dietary fiber: 2g
- Protein: 1g
- Fat: 0.3g (virtually fat-free)
- Sodium: 0.3mg (naturally low-sodium)
- Potassium: 191mg (supports heart health)
Antioxidant Powerhouse Benefits:
Sour cherries are a “bomb” of vitamins and minerals, valued especially for their remarkable antioxidant and anti-inflammatory potential, being a treasure of various phytochemicals, such as anthocyanins, flavonoids, flavanols, procyanidins and phenolic acids. These compounds contribute to the jelly’s deep ruby color while providing significant health benefits.
Key Vitamins and Minerals:
- Vitamin C: 7mg per serving (supports immune function)
- Vitamin A: 55IU (promotes eye health)
- Iron: 0.3mg (supports healthy blood production)
- Calcium: 11mg (bone health support)
Healthier Alternatives for the Recipe
Transform this classic cherry jelly recipe into a more nutritious version without sacrificing that beloved sweet-tart flavor:
Reduced Sugar Variations:
Replace traditional sugar with natural alternatives like pure maple syrup (use 1½ cups), raw honey (1¼ cups), or coconut sugar (1¾ cups) for deeper, more complex flavors. If you want to add extra sweetness, use a bit of honey or maple syrup, which are both great natural sweeteners.
Pectin-Free Option:
Create a naturally thickened jelly by adding 1 cup of grated green apple to the cherries during the initial simmering phase. The apple’s natural pectin content creates a beautiful gel without artificial additives.
Spice Enhancements:
You can also add spices that complement the taste of cherries, like cinnamon or nutmeg. Try adding a cinnamon stick during cooking, or incorporate ¼ teaspoon of vanilla extract for a gourmet twist.
Lower Sugar with Stevia:
For diabetic-friendly options, use 1 cup sugar combined with ½ teaspoon liquid stevia, maintaining sweetness while reducing overall sugar content by 50%.
Serving Suggestions
Elevate your homemade sour cherry jelly beyond simple toast spreading with these inspired serving ideas:
Breakfast Brilliance:
Swirl cherry jelly into Greek yogurt for a protein-packed breakfast, or layer it between pancakes with mascarpone cheese for an elegant weekend brunch. The tartness cuts through rich breakfast foods beautifully.
Gourmet Cheese Pairings:
Create stunning appetizer platters by pairing cherry jelly with aged cheddar, creamy brie, or tangy goat cheese. The sweet-tart flavor profile complements both sharp and mild cheeses exceptionally well.
Dessert Applications:
Use as a glaze for cheesecakes, fill thumbprint cookies, or swirl into vanilla ice cream for an instant gourmet dessert. The jelly’s natural pectin creates a perfect consistency for dessert applications.
Savory Combinations:
Transform dinner with cherry jelly glazes for pork tenderloin, duck breast, or roasted chicken. The acidity tenderizes meat while the sweetness caramelizes beautifully under heat.
Common Mistakes to Avoid
Navigate potential pitfalls with these expert insights gained from generations of preserve-making wisdom:
Temperature Control Errors:
The most critical mistake involves rushing the gel stage. Many people get away with skipping the waterbath, but I really can’t recommend doing that from a public health standpoint, especially since these posts are seen by people all over the world. Always test for proper gel formation using the frozen plate method or thermometer readings.
Sugar Ratio Miscalculations:
Resist the temptation to dramatically reduce sugar content without understanding pectin chemistry. Sugar isn’t just sweetener – it’s crucial for proper gel formation and natural preservation. Reducing sugar by more than 25% without adding commercial pectin often results in syrupy consistency rather than proper jelly.
Equipment Contamination:
Never skip the jar sterilization process. Improperly cleaned equipment introduces bacteria that can spoil your beautiful jelly or, worse, create unsafe conditions. Always use sterilized jars, fresh lids, and clean utensils.
Overcooking Consequences:
Extended cooking beyond the gel point creates tough, rubbery textures and can break down the cherry’s natural pectin. Watch for visual cues: proper jelly coats the spoon and drops in a sheet rather than individual drops.
Storing Tips for the Recipe
Maximize your cherry jelly’s shelf life and maintain peak flavor with proper storage techniques:
Pantry Storage (Properly Canned):
Water bath processed jars maintain quality for 18-24 months when stored in cool, dark locations between 50-70°F. Avoid temperature fluctuations that can compromise seal integrity.
Refrigerator Storage:
Unsealed jars or those not processed in water baths stay fresh for 3-4 weeks refrigerated. You can keep cherries in the freezer for up to a year, and this principle applies to properly frozen cherry jelly as well.
Freezer Preservation:
Pour cooled jelly into freezer-safe containers, leaving 1-inch headspace for expansion. Properly frozen cherry jelly maintains quality for 12 months, though texture may be slightly softer after thawing.
Quality Indicators:
Monitor for changes in color, texture, or aroma. Properly stored jelly maintains its vibrant ruby color and glossy appearance. Discard any jars showing mold, off-odors, or compromised seals.
Conclusion
This sour cherry jelly recipe transforms summer’s fleeting cherry harvest into year-round breakfast luxury using just three simple ingredients. The natural balance of tart cherries, brightening lemon juice, and sweet sugar creates a preserve that captures summer sunshine in every spoonful. From the initial cherry preparation through the satisfying gel stage testing, this traditional method produces consistently excellent results that far surpass store-bought alternatives.
Ready to create your own ruby-red treasure? Try this cherry jelly recipe this weekend and experience the satisfaction of homemade preserves. Share your results in our comments section below – we love seeing your beautiful jars and creative serving suggestions! Subscribe to our newsletter for more seasonal preserve recipes and never miss another opportunity to capture nature’s bounty in your kitchen.
FAQs
Q: Can I use frozen sour cherries instead of fresh ones?
A: Absolutely! Thaw frozen cherries completely and drain excess liquid before proceeding with the recipe. You might need to cook slightly longer to achieve proper consistency since frozen cherries contain more water.
Q: Why didn’t my jelly set properly?
A: Several factors affect gel formation: insufficient cooking time, incorrect sugar ratios, or altitude adjustments. Ripe, tart red cherries will produce a tangy juice that is relatively acidic, so adding lemon juice to the jelly recipe is not necessary. You can add the lemon juice for a little more zing, but the jelly does not need the lemon juice to gel as some other fruits do. Always test for gel stage using the frozen plate method.
Q: How long does homemade cherry jelly last?
A: Properly canned and sealed jars last 18-24 months in cool, dark storage. Refrigerated unsealed jars stay fresh for 3-4 weeks. Always check for signs of spoilage before consuming.
Q: Can I reduce the sugar content significantly?
A: Another option is Pomona’s Universal Pectin for low-sugar recipes. You will need to follow the instructions in the box, as this pectin is a 2-part low-sugar pectin, and the steps are different than for regular pectin. You will get a lower yield using less sugar and low-sugar pectin.
Q: What’s the difference between jam and jelly?
A: Cherry Jelly is a delicious way to preserve cherries, and there’s no pitting required. That’s when I start making cherry jelly because it’s one of the few cherry preserve recipes that doesn’t require pitting. Jelly is strained smooth while jam contains fruit pieces.
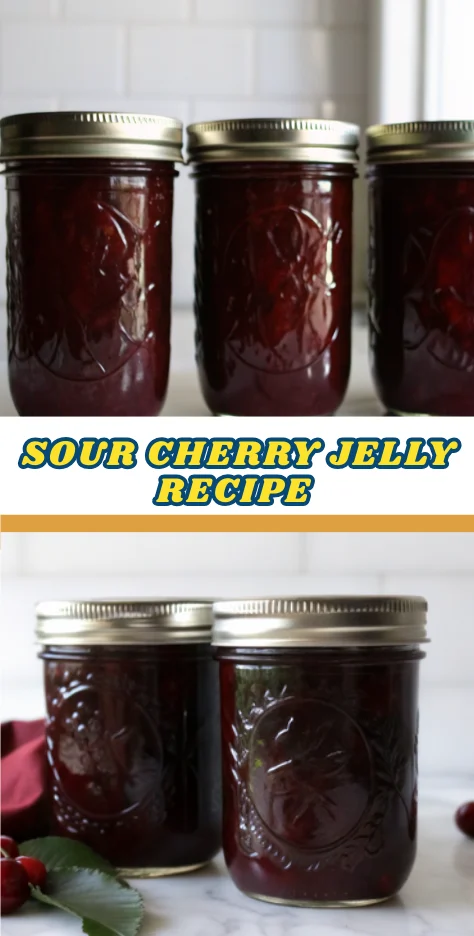
Homemade Cherry Jelly Recipe: From Fresh Cherries to Perfect Spread in 90 Minutes
- Total Time: 90 minutes
- Yield: 5–6 half-pint jars 1x
Description
This sour cherry jelly recipe transforms summer’s fleeting cherry harvest into year-round breakfast luxury using just three simple ingredients. The natural balance of tart cherries, brightening lemon juice, and sweet sugar creates a preserve that captures summer sunshine in every spoonful.
Ingredients
- 3 lbs fresh sour cherries (Montmorency variety preferred), pitted
- 2 tbsp fresh lemon juice
- 2 cups granulated sugar
- Optional: 1½ cups honey, or 2 cups coconut sugar as substitutes
- Optional: 1 package of Sure-Jell pectin for a firmer set
Instructions
- Wash cherries, remove stems, and pit them (yields about 5 cups pitted fruit).
- Place cherries and lemon juice in a heavy-bottomed pot over medium-high heat.
- Simmer for 20 minutes, stirring frequently until cherries release juices.
- Stir in sugar and continue cooking for 25-30 minutes until thickened.
- Test consistency using the frozen plate method or thermometer (220°F at sea level).
- Strain mixture through cheesecloth for clear jelly, then ladle into sterilized jars leaving ¼ inch headspace.
- If canning, process jars in boiling water for 10 minutes (15 minutes above 6,000 ft).
- Cool jars completely, check seals, and store appropriately.
Notes
Always sterilize jars and equipment before filling to prevent contamination. For smoother jelly, strain before final cooking stage.
- Prep Time: 30 minutes
- Cook Time: 55 minutes
- Category: Preserves
- Method: Stovetop & Canning
- Cuisine: Homemade
Nutrition
- Serving Size: 1 tablespoon (20g)
- Calories: 150
- Sugar: 36g
- Sodium: 0.3mg
- Fat: 0.3g
- Saturated Fat: 0g
- Unsaturated Fat: 0.3g
- Trans Fat: 0g
- Carbohydrates: 39g
- Fiber: 2g
- Protein: 1g
- Cholesterol: 0mg